|
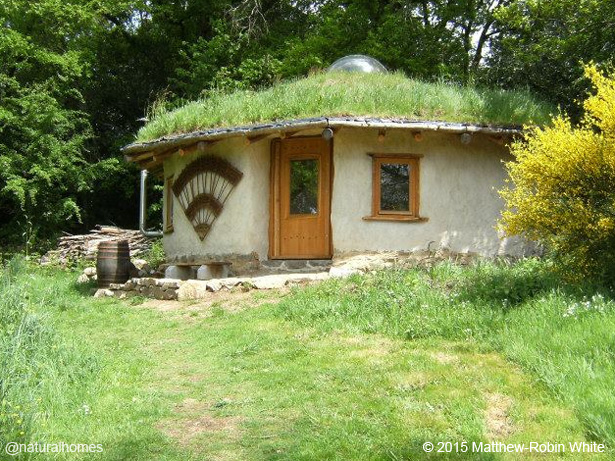
The 7m diameter French roundhouse (6m internally)
stands on a rubble trench [see picture 1] cut deep enough to reach
below the frost line. This protects the building from movement in
the winter when the ground above the frost line freezes and
expands. The trench is filled with rubble over drainage pipes that
channel out any water collected from above. A ring (often
incorrectly called a henge) of debarked douglas fir roundwood,
15-20cm diameter, stands on stone pads that rest on the rubble
trench [2] braced by six timbers to stop the frame twisting. The
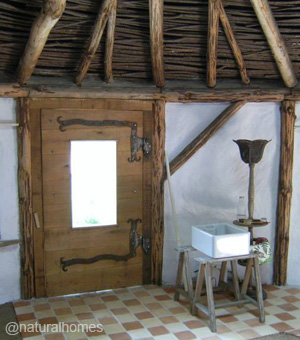
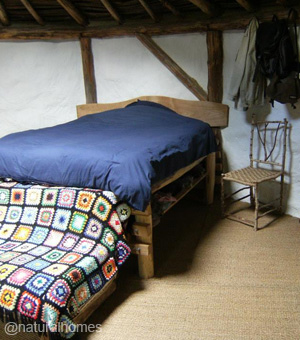
ring of timbers supports a
reciprocal roof [3] that will eventually leave the ceiling
height at 2.2m by the wall and 3.6m in the middle. The roof is
covered with willow branches [4] which later support the green
roof above a geo textile membrane [5]. Traditionally a
green roof would use birch bark lasting some 30-40 years.
Above the geo textile is a layer of 15cm of straw insulation
covered by another layer of geo textile on which loose soil, a
drainage pipe [6] and 10cm deep turfs were laid. The stem wall [7]
is a granite dry stone wall with earthen mortar. This raises the
straw bales above the ground level (grade) protecting them from
rain. The straw bales [8] were plastered with subsoil and lime
(NHL3.5) mixed 4-5 parts subsoil to 1 part lime for the first coat
and 3 parts sand 1 part lime for the second coat. The walls inside
are lime washed to help lighten the interior. The
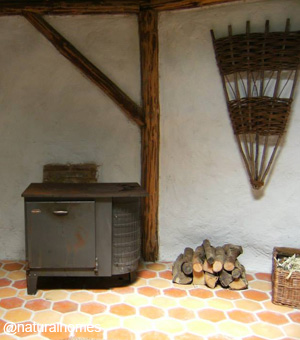
floor is a limecrete mortar consisting of 2 parts subsoil, 1 part
sand, 2 parts pozzolane gravel (volcanic rock a bit like pumice)
and 1 part lime (NHL5) poured over a geo textile sheet resting on
a 15cm deep layer of stones. The floor was finished with earthen
tiles laid and jointed with lime mortar and then covered with seagrass
matting. The wood burning stove (below) gets the house warm in
less than a hour which stays warm in freezing temperatures for
around 15-20 hours without the fire. Like any house condensation
can form on the skylight dome, but the droplets roll down to the
edges and filter into the turf's soil joining the rain.
It's rare that any house is built by one person
and this house was no different because Matthew had help from many
hands including
Tony,
Joe, Kristian, Sam, Ali, Edouard and Guillaume. You can see more
stages in the building process
 here on Matthew's Facebook profile.
 |
|